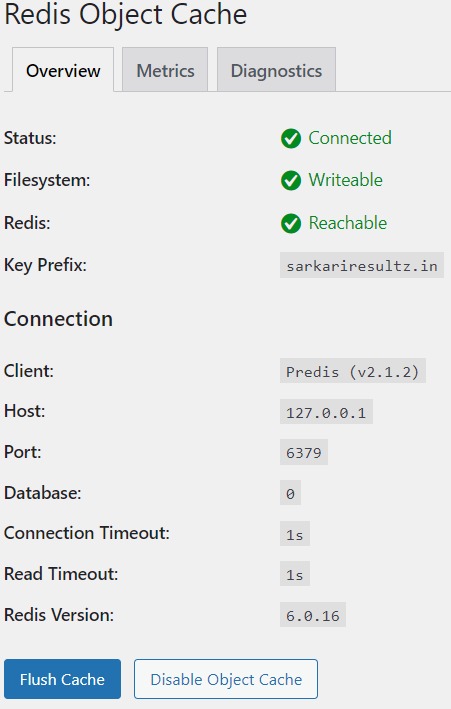
Redis installation on ubuntu 20.04
1st step: update & install redis server form ubuntu repository
sudo apt update && sudo apt install redis-server
2nd redis server configuration
edit
sudo nano /etc/redis/redis.conf
change:
: supervised no // change here
supervised systemd
then it runs as a service
bind local or remote address
bind 127.0.0.1 ::1
maxmemory 256mb
maxmemory-policy allkeys-lru
step 3 restart reload redis
systemctl restart redis
systemctl status redis
check port redis running or not
sudo netstat -lnp | grep redis
to check ports
redis-cli
send ping then it returns pong.
php 7 install redis extension
redis
How to use redis wordpress
installing and configuring Redis, >> installing a PHP extension, >>Redis Object Cache plugin.
#1 Installing php redis extension
#2 by Enable Redis object cache in w3 Total cache
Performance (w3tc)>> General settings>> page cache>>
- Disc basic
- Disc enhance
- Php Apcu
- Redis (it will available once you load redis PHP extension)
#3 Edit wp-config.php file (no need redis plugin installed)
define(‘WP_CACHE’, true);
define(‘WP_CACHE_KEY_SALT’, ‘yoursite.com’);
Note: object-cache.php (generated by any plugin) should be ar wp-content directory.
#2nd way install redis object cache plugin

if root access then try this command. shared hosting servers may not offer this.
redis-cli monitor
Verify if Redis working with redis-cli monitor
redis-cli monitor
When you run this command, you will see the real-time output of Redis serving cached queries. If you don’t see anything, visit your website and reload a page.
Go to the terminal and access Redis CLI using redis-cli and the KEYS *
Retrieving All Existing Keys
It may ruin performance when it is executed against large databases.
> KEYS *
1) "title:1"
2) "title:2"
3) "title"
4) "author:2"
5) "author"
6) "author:1"
using redis and mysql together
Redis is an in-memory databases, faster as compare to query the data from hdd MYSQL. also read mysql buffer pool cache
how to use redis with mysql database in Apache nginx
redis php extension from github (predis library from github), or wordpress directory
mysql smart plugin,
like memcached plugin for mysql
InnoDB memcached plugin ( daemon_memcached ) provides an integrated memcached daemon.
Reinstall Uninstall & install redis on Ubuntu 20.4
sudo apt-get remove
sudo apt-get purge redis-server
//pyrhe removes config files
apt install redis-server
check status
service redis-server status
root@-s-4vcpu-8gb-blr1-01:~# service redis-server status
● redis-server.service – Advanced key-value store
Loaded: loaded (/lib/systemd/system/redis-server.service; enabled; vendor preset: enabled)
Active: active (running) sin
ps aux | grep redis
edit redis configuration file
restart
service redis-server start
MySQL and Redis drivers
Installing Redis from source
sudo apt install build-essential
2.working with redis configuration file
3.Create Redis systemd Unit File
[Unit]
Description=Redis In-Memory Data Store
After=network.target
[Service]
User=redis
Group=redis
ExecStart=/usr/local/bin/redis-server /etc/redis/redis.conf
ExecStop=/usr/local/bin/redis-cli shutdown
Restart=always
[Install]
WantedBy=multi-user.target
save the file by CTRL+X and type and hit enter.
4.Creating User /group /directories and permissions
sudo adduser –system —group –no-create-home redis && mkdir /var/lib/redis && chown redis:redis /var/lib/redis && chmod 770 /var/lib/redis
start
sudo systemctl start redis
stop
sudo systemctl stop redis
restart
sudo systemctl restart redis
Enable Redis on every Bootup
APcu vs Memcached vs Redis
Does not share the cache with other servers but is faster (maybe)
ACPU Installation
apc.shm_size = “50M”
apc.shm_size = “40M”
enable memcached plugin with mysql
libmemcached.so: the memcached daemon plugin to MySQL.
innodb_engine.so: an InnoDB API plugin to memcached.
libevent must be installed.
sudo apt-get install libevent-dev
2. step
mysql> source MYSQL_HOME/share/innodb_memcached_config.sql
mysql> SHOW TABLES;
Activate the daemon_memcached plugin by running the INSTALL PLUGIN statement:
mysql> INSTALL PLUGIN daemon_memcached soname “libmemcached.so”;
telnet localhost 11211
how to use memcached with wordpress
#1 install memcached ubuntu / debian family
sudo apt-get update && sudo apt-get install memcached
sudo apt-get install libmemcached-tools (optional)
#1.1 configuring memcached conf memory limit
sudo nano /etc/memcached.conf
default values are enough but 64mb memory
binding
add top of the file if not
-l 127.0.0.1
disable UDP
add bottom of the file
. . .
-U 0
uncomment
. . .
-vv
to enable logging
/var/log/memcached
memory allocation
Locate the -m parameter.
value to MB or GB based on DB size frequently accessed data.
256MB for low end servers 512MB 1Gb as per need.
sudo systemctl restart memcached
#2 install php -memcached extension from github
#3 Edit wp-config.php file
define(‘WP_CACHE’, true);
define(‘WP_CACHE_KEY_SALT’, ‘yoursite.com’);